Week 1
Rigging Overview - Tentacle
In this week's class we learnt the basics of rigging.
Started off by modelling a tentacle shaped 3d object.
Then turned on rigging in Maya and created joints, then made them into joint chains on our tentacle. However, at this point by rotating the joints the object did not follow.
Skin mesh to joints attaches our created joints to the 3d object. Following that we added controls to joints.
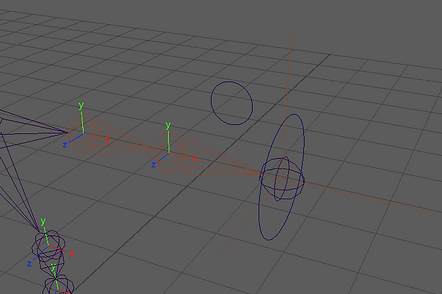
The video on the right shows expression editor tab open and the movement of our made expression using sin.

Here is a close up screenshot of the joint editor.
To make an expression I choose the top joint control which made a movement to the top 2/3 of my 3d object
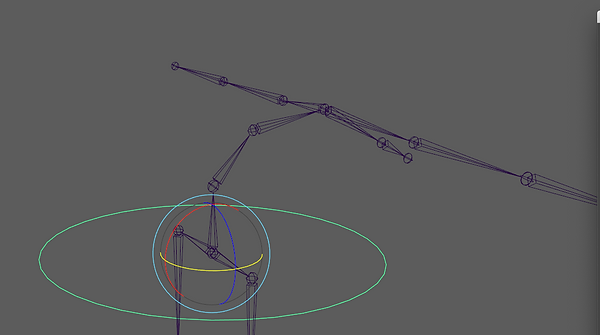
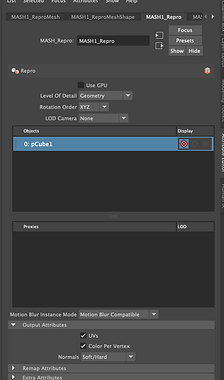
Next we created a MASH network which made the tentacles connected to a sphere, offset the animation using MASH Time and added Mash signal node to add random movement
The final result out of one testicle now is many testicles that are randomly moving attached to a few spheres. Reminds me of bacterias.
Week 2
Joint Creation

Creating joins and parenting
Rigging>Skeleton>Create Joints
Make the joints a bit lagger by adjusting short bone radius
Started off by adding one by one joint on X axes then using W shortcut adjusted it to fit the first joint. Next step was to match the joints to the left hand.
Need to be careful when moving the joints cause the X axes might switch, what I did was carefully rotating in X Y views not perspective


Here it is seen that my joints are all facing straight X axes one after other
This video shows the next step of creating joints of a character and it is the leg.
Very important step when fitting the joints is to display local rotation axes and fit the joint according to that.
Useful tip is to use V as snapping tool


After getting your joints in right place it is important to every single joint otate values into Joint Orient and zero out Rotate values.

Next step was to create the spine and after having one arm, one leg and the spine with neck I mirrored arm and leg parented (shortcut P) those parts with the spine

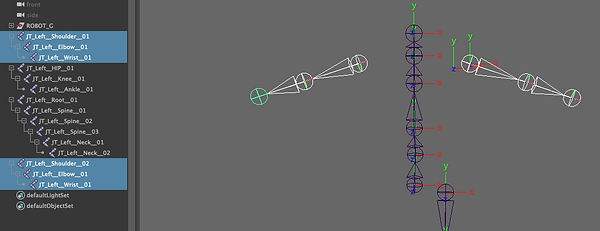
Mirror Joints
For example to parent arm to spine I selected shoulder joint and the closest spine joint and pressed P


After setting the joints I had to parent mesh the robot to joints
In this video I parented the robots parts to the created joints and afterwards I was able to move the character with each joint.
To parent mesh you select robot's parts press Shift+P and middle mouse drag them to their joint in the outliner
The outcome
Now by selecting joints and rotating them the robot moves
Assignment one
Mechanical rig
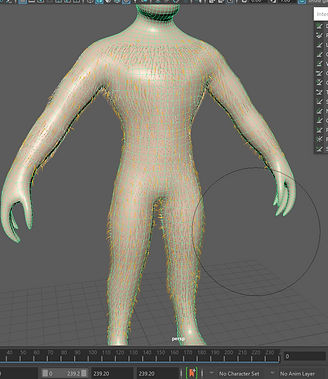
For the first assignment I had to make a basic 3D model and rig it, show techniques used and do a little render sequence of the character showing it's abilities to move/


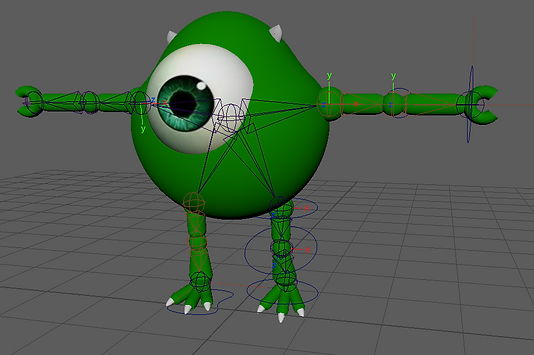
I decided to make a Mike Wazowski from my favourite animated movie Monster Inc.
I found a image, uploaded it to Maya and used as a guide to model the rig.

This is the model before texturing, it's mainly made out of cylinders and circles.
To make rigging easier, I combined ears, head and eye into one, as well as the toes into one foot.


To texture I used ArnoldStandardsurface and applied colour, however for the eye I used an image of an eye.
Week 5
Rigging Controls Robot
This week we continued to work on rigging controls.
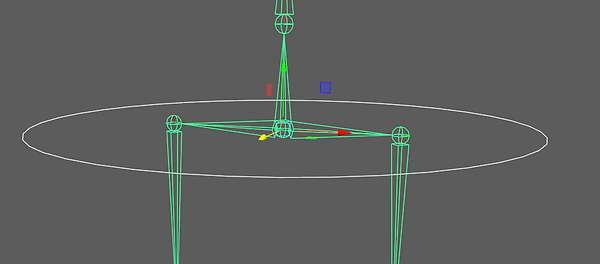
Here is a nurbsCircle snapped (v) to the middle of the root joint.
After putting it in the middle and adjusting it's size to our own reference it is important to freeze transformation before doing anything else
Next step is to select the root joint and the circle and create a Parent constraint
//Always reset settings and make sure the maintain offset box is selected

Next step is creating attributes
With circle selected, navigate to Attribute Editor > Attributes > Create new and the window on the right would pop up.
Down below is the place where you can find your own created attributes


In order to the attributes work we used Driven Keys technique
With our circle as a driver we choose it's upper body part's (spine's) joints as the driven and Rotate Y selected


This is the first control, the robot is able easily have 4 way movements

To make the controls much easier we added another control, star shape and parented it to the circle and used connection editor to have the second control
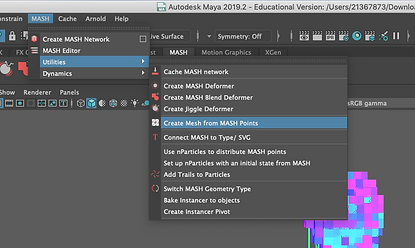
Maya Mash
Smiley face
Started off by making a MASH Network and using Distribute to create a circle and all these squares sticked to it


To create more a nice mesh I used Signal and Random to put more squares and make them stick to the circle in a more random way.

Next step was to add colour to the cubes, I did that by adding Color and adjusting the parameters
Using fall off mesh we added another colour to the circle

Added more 3d objects to make a smile


Assignment 1
Mechanical Rig
This is my rigging process, creating joints for the model and connecting them with each other. After that it was time to make the controls


I was thinking about the controls, I made ikHandles on the arms and did the other controls on my legs but later on when I was animating the legs went a bit weird.
That's why later on I did ikHandles on the legs as well.
Animation process speed up, this was before I made the ikHandles for the legs, therefore, I had to redo all of it again.
The final animation playblast
For rendering I used coloured SkyDome light as well as a Spotlight, adjusted the render settings, I rendered jpeg and later on processed the render sequence in final cut pro, added the original soundtrack.
The final render
Week 14
SUB PIVOT CONTROLS
In today's week lesson we looked at sub pivot controls and did some basic controls on a cone. I did some screen recordings which could help me out in the future
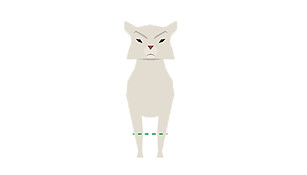
Sub pivot controls on cat's leg

Started off by added three ikHandles one for the leg, ankle and toes.
Grouped them all into one nurb circle
SUB PIVOT CAT LEG FLEX AND TWIST SETUP
CAT LEG TOE PIVOT AND ANKLE SETUP


Making custom attributes for the leg
After grouping the ikhandles, snapping their center pivot in right places and adding joints into the groups it was time to make the extra attributes for easier animating process

Lastly, added a pole vector to have an extra control in the middle of the leg for rotation
Assignment 2
Organic Rig
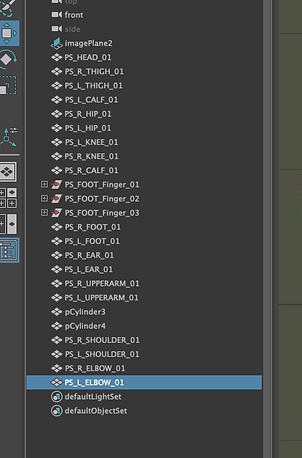
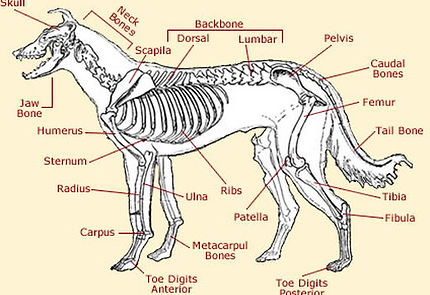
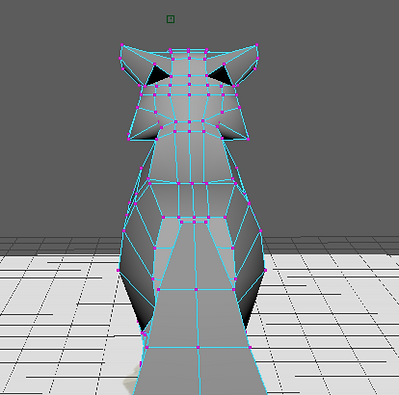
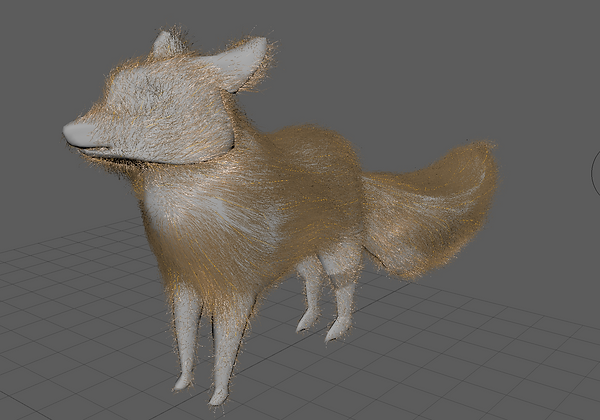
For my rig I decided to model a wolf. Looked up some reference images to have a better idea of wolf anatomy, muscles and joints.


Beginning to model
I began by finding some decent reference images, placed them in right places so that they would watch in placement and size.


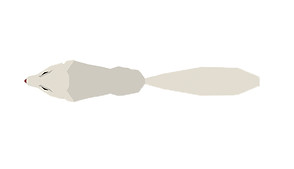
These are original reference images


I started off just with a cube with subdivisions on the body and moved the vertex with move tool, slowly shaping into the right way. It was very low poly, later on I added some edge loops.
Progress
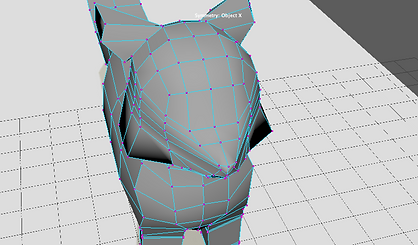
When I began modelling the head I realised that my model is somehow unsymmetrical and some faces were not squares because of the multi-cut that I used and it caused major issues. I couldn't add edge loops where I wanted.
So in the end, I cut off the head and started all over again.


This was the progress so far, I decided to cut off the head, fix the body to make it symmetrical and do the head separately

Progress update

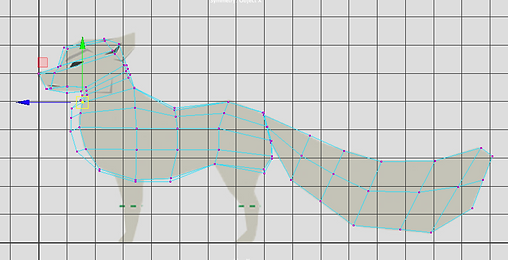
I fixed the body and made it symmetrical.
For the head I added a square with subdivisions and used the smooth tool to make it rounder.
To merge I deleted faces from the circle and body and merged the vertex and connected the head to the body


Added some extra edgeloops around the main joints for support for animation.


Smooth view of the progress so far. Modelling the mouth was a bit tricky, yet I need to narrow it cause the face of the wolf is still a bit wide. Also, need to do the eyes.

Mouth progress

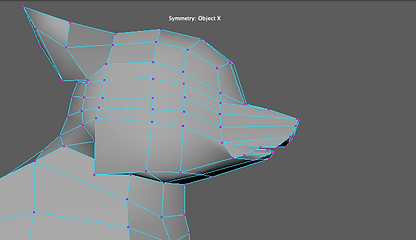


Here is a little update on the head, I narrowed the mouth and made the nose and mouth sharper.
Week 8 exercises
MASH NETWORKS
Mash settings for Arnold rendering


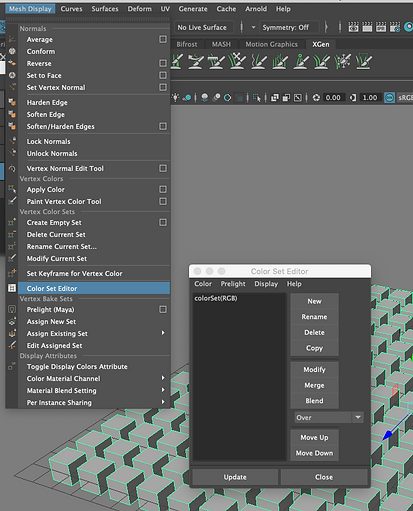
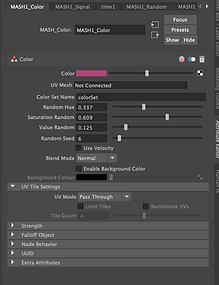
Adding colour to mash networks
Creating an attribute and selecting the attribute in Color set Editor

Mash networks trails
Week 13
Squash and stretch
JT CHAIN
Started off by making little spheres and adding lambert material. Adding joints in the gaps while pressing X to stick the joints in one straight line.
Parenting joints to the spheres.


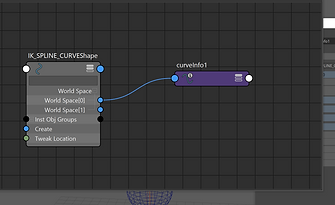
SPLINE IK HANDLE
SPLINE CURVE INFO
After setting up the IK handle I duplicate the first and the last joints and binded skin with the Ik handle curve.
CONTROLS AND CALC SCALE FACTOR
Instead of clusters I made two controls: Top and Base.
In Node editor I connected the ik handles curve world space with curve info to be able to do calc volume preservation with divide node
CALC VOLUME PRESERVATION
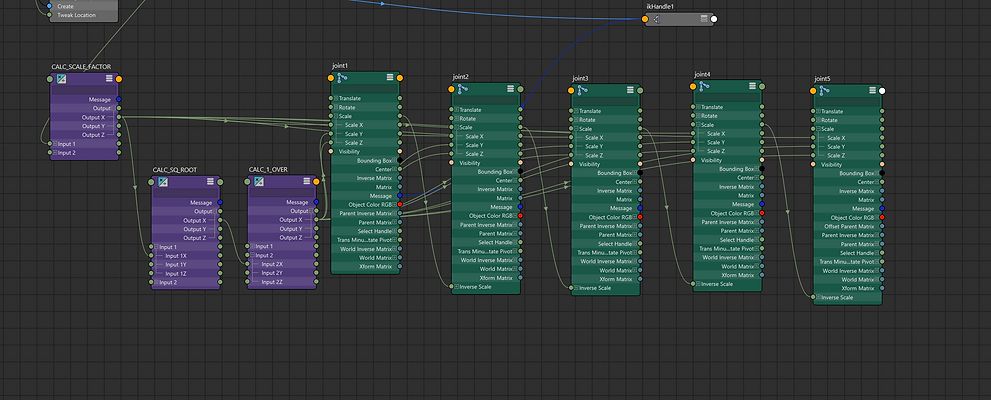

Calc scale factor operation was divide, meanwhile Calc square root operation was power and the input two I changed from 1 to 0.5
Another multiplyDivide node was Calc 1 Over and his operation was Divide and his X output needed to be connected to joints Y and Z
Animating and rendering just for fun I guess

Added some lights, shadow matte plane and did a little animation by using keying and moving and rotating the controls
WEEK 14
FUR
MESH SET UP

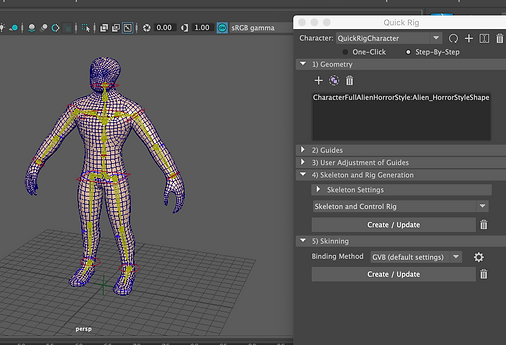
Setting up the project, rigging the character, applying mocap
FUR SET UP
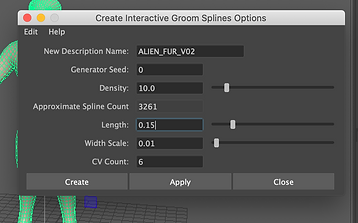
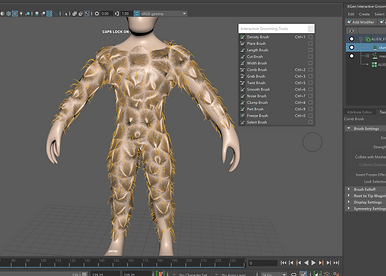
Started off by creating interactive groom spines and they appeared all over the model.
Adjusted the primitive attributes, also increased the density multiplier


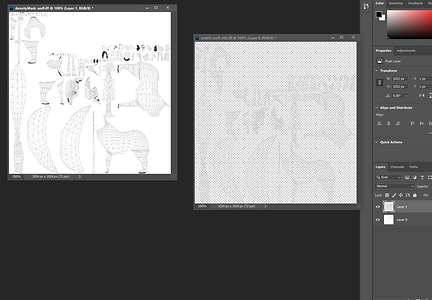
Density mask
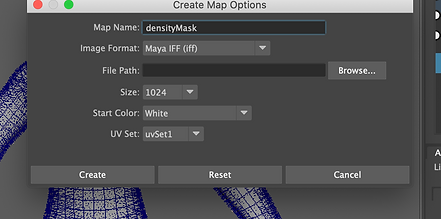
Density mask purpose is to remove the fur from parts of the body which don't require fur. Using a brush it's quite easy to remove, however, using brush in Maya is tricky and some fur particles don't dissapear with the brush


FIXING DENSITY MASK
Density mask is based on models UV map which easily can access by selecting the model and using the automatic function.
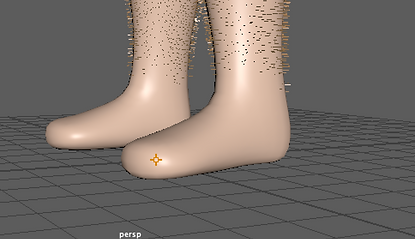
Basically removing the particles with the brush colours the density map in black and it's not very accurate.
Therefore putting it into Photoshop and painting the unwanted areas in black will remove any remaining hairs which didn't remove with the brush in Maya


After reloading the Photoshoped density mask the little particles completely disappear and when can start grooming


GUIDES SET UP
GROOMING
Before grooming I set up my model, open up interactive grooming tool barcreate a Master guide layer and create Input guide which has it's own sculpt, scale and In guide base, reload the density mask, copy the previous primitive attributes, reduce density multiplier, make sculpt layers for each different interactive grooming tool. Make sure collide with meshes is turned on.
Beginning of combing

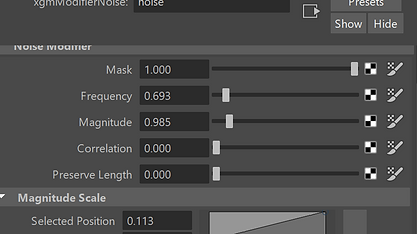
Clumps
After taking the time to properly groom the model with multiple sculpting layers and brushes it is time to do clumps.
First thing to do after grooming is to increase the density and check for any bold spots also the master guide will not work anymore so you need to take extra care before adding it since grooming won't be available later.
Clump is a modifier in the interactive groom editor window. To make the clumps I adjusted a few settings and also did some work in the Node editor to achieve smooth fur. I did two clumps and added noise modifier.
Clump before adjustments
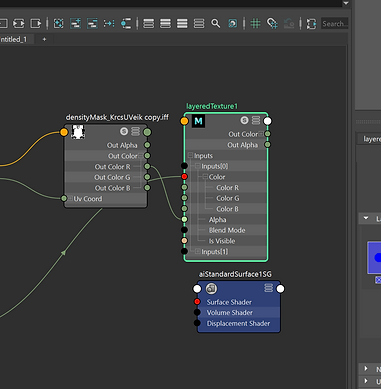
Render settings
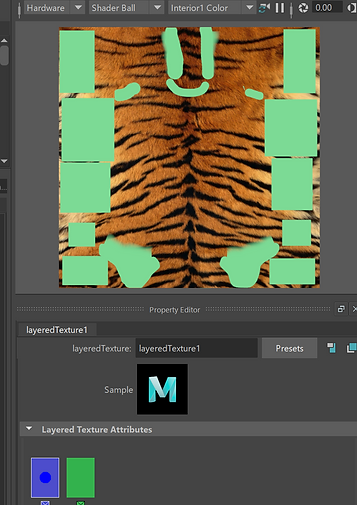
For texture I used Arnold hair and layered texture. On the left is the density map over the tiger material which I wanted to apply only to the fur
A couple of still renders
In the end I made the alien a bit see through, for the floor I added seemless material to a lambert and did Arnold sky

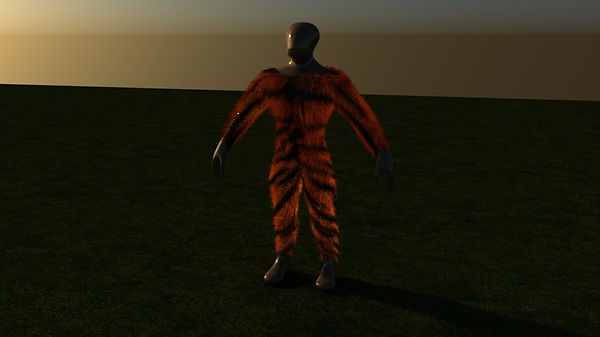
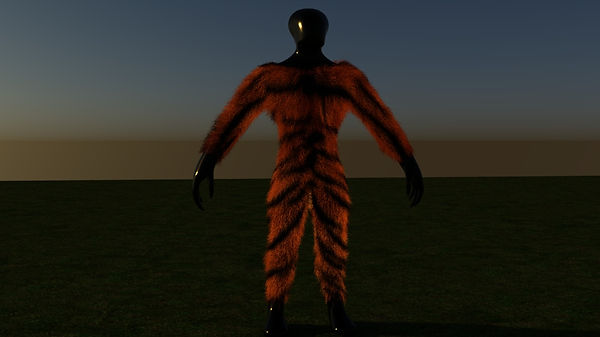
Final render
Assignment 2
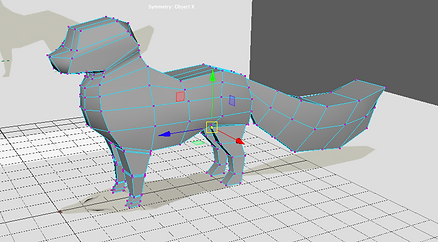
Organic rig
Rigging the model
Speed up video of me adding and connecting joints, mirroring
Next step was to do controls and started of by adding Ikhandles to my model's legs and tail
Next video shows the process of adding pole vectors to Ik handles
I grouped the Ik handles, joints and pole vectors, made controls for the tail, legs, spine, neck and ears and this is the final look before animating

My initial idea was to create mouth controls as well but I didn't have enough time for it so removed the mouth joints in the end. Here is how the joints and controls looked before I binded sking and started animating.
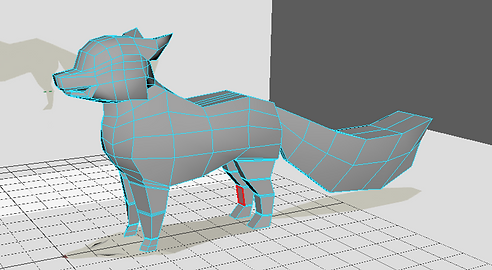
Animating
Animating is probably my favourite part, just moving controls keying and making it look as smooth as possible. To recreate wolf's walk I did look up for reference of they walk.
Made my little wolf walk a couple of steps and rise his front paws, wiggle the ears and tail.
Fur
Following the same guidelines as in the previous fur exercise I did my fur the same way, markers, combing and usings layers for different brushes, having guide master layer
After brushing I made the density to 50 and tried to fix the blind spots using brushes again
density mask


Density mask to remove the hairs from some faces, exported the iff to photoshop and adjusted it there, brought it back. Density mask is applied before brushing and combing
Clumping


this is the fur after the clumps and noise layers and for my model I did add magnitude and frequency in noise but not too high as I wanted a more sleek look

Rendering

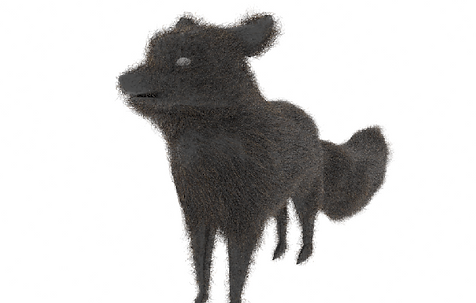

This is how the fur looked, afterwards I did add picture of eye to the eyes and also did a hdri raven background and shadow matte plane and rendered my animation sequence.

