Week 1
Digital Matte Painting
This week we focused on using Photoshop and got introduced into Digital Matte painting. Below is a quick matte painting inspired by Savannah.

Home work
For our homework we had to improve our first matte paintings as well as create two more paintings in different themes: Savannah (or Lion King inspired, James Bond's Skyfall and Tokyo view inspired by Blade Runner. Here are mine interpretations
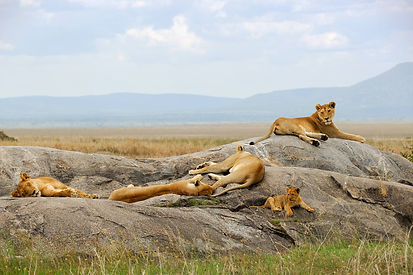
Savannah
Most of images used to create my Savannah matte painting

_tortilis_jp.jpg)


Selecting desired areas from images and creating masking layers, adjusting the brightness and contrast, saturation and other colour settings to create as smooth image as possible. Using blur, pencil, quick selection and other similar tools.

Skyfall/Highlands of Scotland


Tokyo/Blade Runner


JOSH PARKS MASTER CLASS

On the first day of the master classes we learned the basics of Nuke, essential nodes, changing green screen with keylight or IBK stacking technique


We also learned about Grade node, how to use colour wheels, Toe node.
We had to choose a background for our green screen, I choose a painting of old Greece. We also did smoke technique which Josh Parks used when working on Game of Thrones.


Day 1 results
Day 2


Today we focused on colour grading.
We had a task to try and match little monsters into the schene.
Using Grade node - adjusting gain (ctrl+colour wheel) and gamma to achieve believable result


Day 3

On the last day we continue working on our projects, fixing any issues, tracking, adding special effects, more grading and etc.
Special effects that I used for my composition
The outcome after 3 days
Wall-E - Live Action Reboot
Ideas & Reference images
Room inspiration
For our group project, we decided to take a slight twist and, instead of focusing on rubbish and shades of yellow and brown like in the movie Wall-E, we thought of creating an abandoned room with nature peaking through.
After all, places that are left abandoned usually become green. All these different plants find their way through.
A good example of this process is the outcome of the Chernobyl nuclear disaster. After years of abandonment, the architecture stayed almost exactly the same as after the accident yet nature started growing and taking over. It's a beautiful process that we want to add to our project.


Chernobyl and Pripyat nature today


Colour palettes


Our shot quick sketch

The modelling and composition
Firstly, we created plain 3D assets, furniture, bookshelf as well as walls. Arranged the composition and locked a camera view.
Here is her part of the work, from here it's my work to texture the whole room, create curtains with nCloth, broken glass window simulation, prepare the materials and lights for render and render the scene. Also, add a couple of plants from Megascans.


Camera shot before texturing and lights

Texturing-Animation-Simulations

Started off by texturing the sofa, pillows. Put a wooden flooring texture, added two street curbs from Megascans and shattered the glass with Maya simulation.

Added brick wall, however, later on, I changed the wall to a different texture
I found a stock image of a destructed wall but it didn't match with my colour palette so I adjusted it to my desired colours


Here is the wall added by UV Planar using Arnold AiStandard surface and using the photoshopped image as colour.
Also, piece by piece I moved the shattered glass, added some plants from Megascans, textured the table that is upside down, removed the table lamp and made the bedside table glass material with Arnold. The bookshelf is also textured but I didn't like it so I changed it later on.

Here I changed the bookshelf material, it's made from distorted rocks. Another addition was the lamp, it's just a black brushed metal cable, the bulbs are Arnold's glass materials and the strings inside are 3 different mesh lights.

Here is an update, I made another two lights since I really liked them. This viewport is missing 2 nCloth curtains, textured chest of drawers, tv and another bookshelf


To make a nCloth I created a plane, adjusted its size, faced it near the window and made a silk nCloth.
Also, I made a Cylinder above the window (also just a black brushed metal material) to have something to attach the cloth. I attached the cloth with few top vertexes.
Adjusted the Gravity direction to achieve a slight cloth movement. Repeated the steps for another cloth on the other side of the window.


Another view of the viewport


Little "Easter egg" in the project, the tv is showing Wall-e. I added an image to it's surface and pointed an Area light to create a working TV effect.
Test render 1
From here I will animate the plants and the light bulbs as the wind would be lightly blowing, I will adjust the colours of light bulbs, check the chest of drawers, add more relevant light to the scene, photoshop and add some books to the bookshelf, hang a picture (another "Easter Egg") and will attempt to make the tv glitchy.
The project will have 200 frames and will be rendered with 25fps with Arnold

Another viewport


Another "Easter egg" that I decided to place was a distorted print image of the city Pripyat before the nuclear disaster, I photoshopped the image a bit so that you wouldn't see faces and also for distortion, sepia filter.
The image in the composition looks distorted and fallen from hanging position. I added and animated more plants closer to the camera.
The focus point is the lights and shattered window with slightly moving curtains


Final playblast before rendering
Render view

Couple of still shots
Rendering takes a lot of time since the Megascan objects are high quality as well as chosen textures are high resolution (most 2k, some 4k). Another aspect making the rendering process long is animated plants, moving hand lights and nCloyh curtains.
The last step is to finish rendering all frames snd making the composition in After effects.


Noise reduction
Since our project set up was night time after rendering I noticed loads of noise, therefore, in After Effects I used levels and noise reduction, lens blur from effects & presets to reduce as much noise as possible and make the render sequence high quality

Before

After
After

Final render
Christmas Digital
Matte Paintings
Mercedes Christmas
Used images


Trafalgar Square Christmas
Used images


Vintage Christmas card
Used images


Ice rink in Amsterdam
Used images


