Week 1
Unity intro
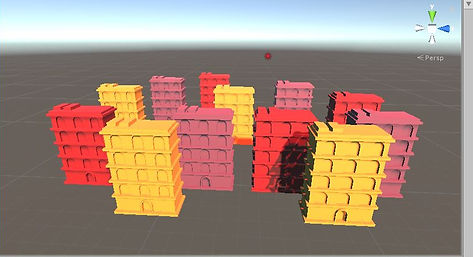
Unity’s primitive objects


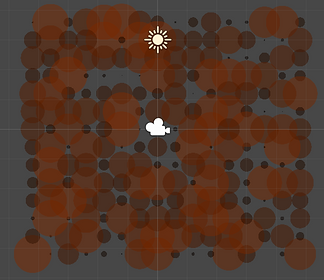
Playing with Directional light, spotlight and adding fog


Week 2
Colour theory
Snapping, Materials & Prefabs


Skyboxes


Week 3
Materials & Particles
Creating different materials for 3d objects


Putting different materials on the rabbit to create different looks like silver, gold, copper, lava and etc.


Introduction to particle system


Week 4
Particles & Procedural art

Using the same 3D bunny and adding to it a particle system which moves around the bunny shape.


Basic scripting


Week 5
Procedural Art & Scripting


Week 8
Sorting
2D objects sorted in different places to create a 2D view like a title sequence.


More 2D sorting making the be hide between bushes or making it fly over.
Camera and chrome keying
Creating different camera views with same game composition


Week 9
Shaders


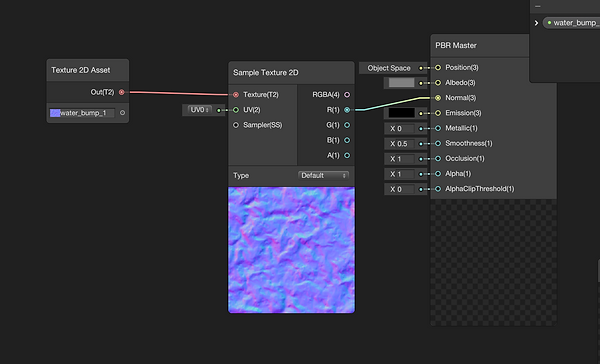
Creating my first shaders in PBR Master.
Playing around with different colours, transparency.
Mixing colours, for example as red and blue to create purple.


Here vector allows to choose which colour to make more dominant than the other


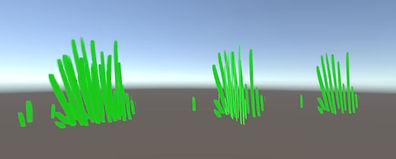


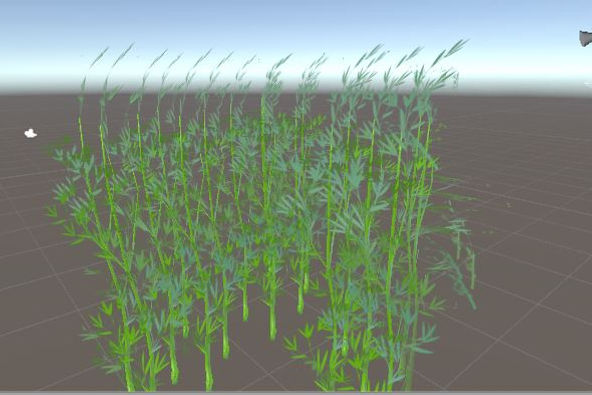
Created a shader for the grass to change its colour and make it move


Week 10
Shader recipes
Toon shader graph

Fresnel effect


Fog Shader


Vertex Position Shader


Normal map shader
Week 12
Optimization
Baking lighting in one place

First steps were to create a patterned plane and add fern plants and add fade material to it.


Changing and playing around with resolution
32 size on the left
128 size on the right

Adding two red and blue spotlights over the fern and lowering the directional lighting intensity


Baked lighting example, if you move the fern the lighting stays in one place as show below.


Created two materials and added them to the 3d model

Attached them both to one empty object and added LOD Group
Duplicated the object plenty times to create a group and here is the final seamless result

Week 13
Basic programming
Variables and functions
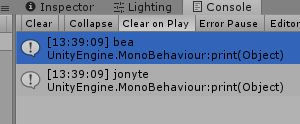
Programming to provide basic text information


Programming to multiply one number times two
Task 1


Programming to add 10 to my number and continue to do it this 10 times
Task 2


Task 3
Programming to add 4 to my number and repeat this step for 5 times


Programming to divide my number by 3
– If statements

If statement about speed
If my speed is zero than it states in the game that I'm not moving
Below is shown example of what happens if the speed is above zero (in example 6), the program states that I'm moving


Here is a programming to determine to which adult category does a number fall
if my number is above 26 than it shows Adult as shown above
On the left the number is 18, therefore, the program would say its a teenager
Unity – Basic Programming in C#
Part 3
Random numbers / Colour

Script for showing random numbers ranged from 0 to 10
A few examples of numbers I got.


Script for making cube color red


Basic programming script to color cube by the random assigned number
If random number is 0 you get a red cube
If random number is 1 you get a blue cube
If random number is 2 you get a green cube
And if you duplicate and create many cubes you get results like this


Unity – Basic Programming in C#
Part 4
Input/ Movement


In the game after pressing space bar a message appears


In the game when you press and hold space bar the cube becomes red and after releasing space bar it becomes green

With this script after you press play the object goes right forever

A basic script that allows to move the cube left and right with left and right arrow keys as well as change speed with added public int

Task 1

Task 2
1st task was to create a script for an object to move in four directions. Here is the script. It has four codes for up, down, left and right.
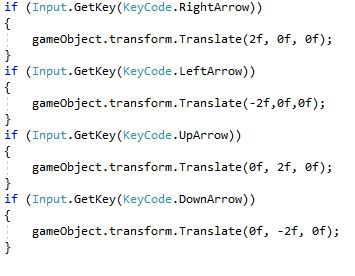

The task was to create a faster moving cubes. Here are the scripts, the larger value of X's and Y's, the faster the object will go using the arrow keys.
Unity – Basic Programming in C#
Part 5
Top Down (Maze Game)

Creating the scene, adding sprites (walls and character) then adding Box Colliders 2d to them. Background a solid colour.

This is a script for characters movements

Here I show that the character can't pass through the walls


Script for the key,
now when the character comes near the key it clicks to him and when a character touches the wall, the key relocates to the wall

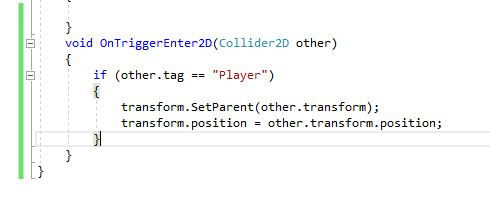
This is key script changed so that the key would stay with the player only when picked up

This is door script.
Now the player can pass the door, however, with keys and with no keys


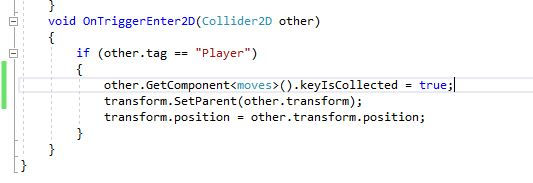
To make doors open only with the key I set a state in my characters movement script, then set that state to true when the key it picked up, and check for that state when the player is next to the door.


Now the doors open only with the key
Adding UI Element to my game.
Making the little key in the corner change as the real key is picked up by the player


Here is the character before picking up the key. The key in the corner is there.

Now it's picked up and only its shape is left in the corner

Task 1
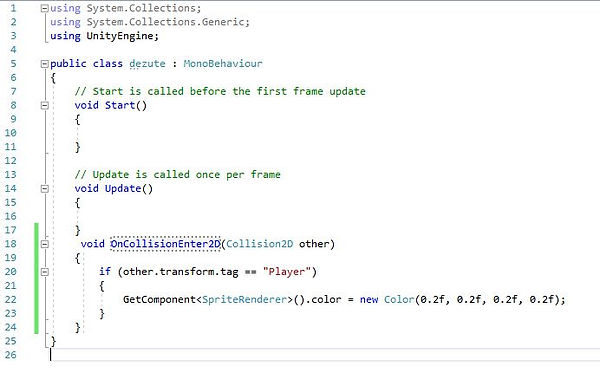
Here is crate's script
It says that if the player touches the crate, the crate will fade (From 1 to 0.2 worth)
This one was a bit though for me,had to think for quite a while and try different ways until finally got it.
Game play of the task 1

We have four crates. Where is the key hiding?

It's not in the top left one

It's not in the bottom left one either ...


It's not in this one too. Only one left to check.
Here it is! The character grabbed it quickly, the sign on the left is indicating that we got it.

And here we go through the doors!
Task 2


Task 2 was to create 2 different doors with different keys. Here is the game play
Basic Programming in C# Part 8
Rotation

Making the blue car move around with arrow keys

Task 1
Added the some boxes with Box Collider 2D to the scene, then for collision the car has a Rigidbody 2D with certain parameters shown below.


Basic Programming in C# Part 7
3 Lane Game

This is the Menu scene


This is a script for the Menu scene that after pressing the Start button it would open the game scene.
Adding both scenes to Build

Lets head to the game scene.
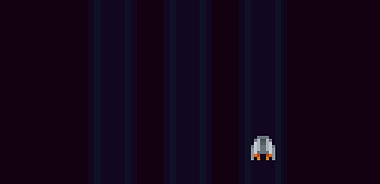
Placing all sprites to places.

Here is the player's movement script
and it allows the player to jump from one line to another.

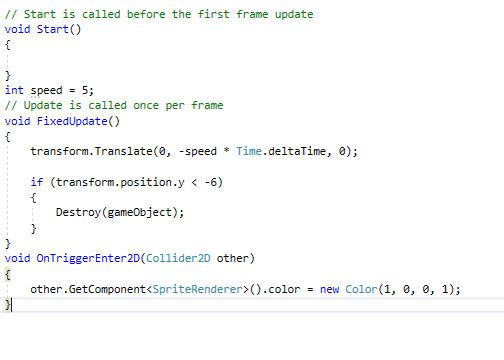
Here is the enemy's movement script
The Enemy sprite goes down till -6 and dissapears. If he collides with the rocket than the rocket changes colour to red.


Script for making the enemy spawn randomly down in our 3 stripes but with no time intervals.

And adding the time interval didn't make the enemy's come normally. For some reason only two would spawn - one original and one clone.
I added a time interval to the MainController script so that the enemy would spawn normally. But other thing happened. I noticed several errors coming after running the game.


Then I changed the enemy's movement script a little bit. I changed the Destroy line from
Destroy(gameObject) to Destroy(this)
After doing so, the error stopped coming up and the enemy's was spawning, HOWEVER, they weren't visible.. just the first two ones.


Here's the problem.
The enemy clones would show up in the Hierarchy but not in the game.


Fixed the problem.
In the main control script I was using the ship from hierarchy and thats why they wouldn't go down, they were spawning from the top and not moving.
When I changed the ship and added the same ship just the prefab ,everything fixed and now the ships are spawning and moving as they should be.


Adding public variable and boolean to Main script


Now the game goes until the ship collides with enemy. Then enemy's stop spawning and try again message shows up.

Task 1

Task 1 was to make clicking on Try Again text to restart the game.
This was simple.
I created a new script, called it StartAgain and made it a scene management
Then added this script to Try Again prefab and now if you press try again the game starts again


After pressing try again the game starts from beginning

Task 2

Task 2 was to make pressing Etc button during the game open the Menu scene.
For this I added a scene management line to the main game control script and in the update added the command to open Menu scene if Escape button is pressed.

