

Playing around with quick selection tool and masks in Photoshop. When I was making a hybrid animal at first I found it difficult to deal with sharp edges and smoothing them out but overall I enjoyed it.


Fake News: Fisherman spotted catching sharks in Silver Town

For my fake news report I decided to choose sharks in central London for random reasons. Putting them into the picture was quite easy (blurred sharp edges with mask and 0% hardness brush), had to play a bit with colour matching and transformation. However, The biggest struggle was the fishermen and their boat. The boat was in a different angle so making it realistic on still water was a challenge. Had to do a lot of patch work, adjustment layers, adding a shadow. Oh and I used mask for the boats same as for the sharks.


The start of Maya
I have never used Maya before so it was a lot to process.
Made my first plane from a rectangle, set subdivisions width and depth to 3.
Then switched to Face and using command+E made the shape of the basic plane.
Later in the evening I made it a bit more 'futuristic' plane but didn't manage to rotate the wings a bit down.
All these small models were made within 5 minutes


Last lessons work.
A Mac computer, knife, a toaster and and I swirl figure


Week 5 lesson work.
First example of Bond Gadget - a ring with laser on top.
Lighting, aiStandard Surface

Playing around with these bubbles and using different Arnold materials gave me a wider view of what I can do with Maya myself.
During this lesson I learnt about a few lighting techniques, Arnold rendering and about surface materials.


James Bond Gadget
For my James Bond Gadget I decided to create a coffee mashine with devil ears and tail. So far I've got the shape and some materials added to it. Black surface is plastic as well as the buttons. The reflective part is chrome.
I added a surface and lights for it to show on rendered images, however I might change them later on for better reflection of the mashine.
Currently, there's left a bit adjustments and improvements to do for the mashine and I'm still thinking about how to make the devil parts.


This is my current workspace image
UV Planar

Created a 'TV like' shape, searched for an image to upload. To the face of the shape added material, Arnolds AiStandart surface and snd choose to upload 'File'. After that pressed 'Textured' to see the image. And the UV Planar to move picture around (don't forget to choose right axes).
James bond gadget update


Added a logo with UV Planner technique, devil ears and a tail with animation nonlinear bend and spider legs using extrude along Bizear line.
The backround is off, I will change it.
Might do some lighting adjustments as well.
Added the reference DeLonghi coffee machine that I found on Argos.


Fake news (update)
Queen Elizabeth at Lidl grocery store


For my 2nd fake news I decided to transform The Queen into a grocery store. Here on the left I'm showing how i am trying to remove the light little by little from her coat since the original picture is taken in sunny outdoors. It added extra work but I had to choose it since her posture looks perfect.
There was a lot of playing with colours as well as adding her shadow but overall i think it looks convincing from a glance.

Massive tarantula in Southend-on-Sea


This weekend I visited Southend and while I was walking around I got an idea for my final fake news report to have a massive fluffy spider walking cross the road.
Had a lot to transform the spider figure as well as making the colour of him appear realistic.
Was struggling a bit to create a nice shadow on the cars hood.
Final 'James Bond Gadget'

The final result.
What I like about my gadget is the Arnold surfaces which I choose.
However, I think there is much to improve since during the whole process I made a lot of mistakes like moving vertexes, deleting faces or extruding faces by accident and seeing the mistake after a while and being lost and confused.
Theres some pictures of the final views before rendering.


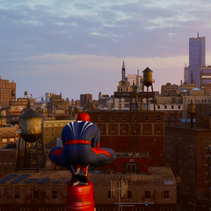
New York Rooftops
Moodboard

The importance of Reference
A quick sketch of my house from my memory

My home from a reference picture

The reference image
The referencing is significant since we can't remember something in such detail and drawing from memory can be tricky. From my example, I draw a much smaller garage roof and I forgot some angles and windows.
On the right the sketch of the house is in much more detail, due to limited time the house is pretty basic but the reference image helped a lot.
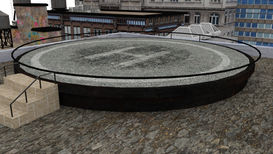
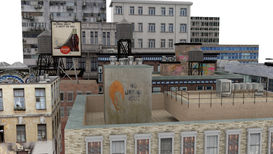
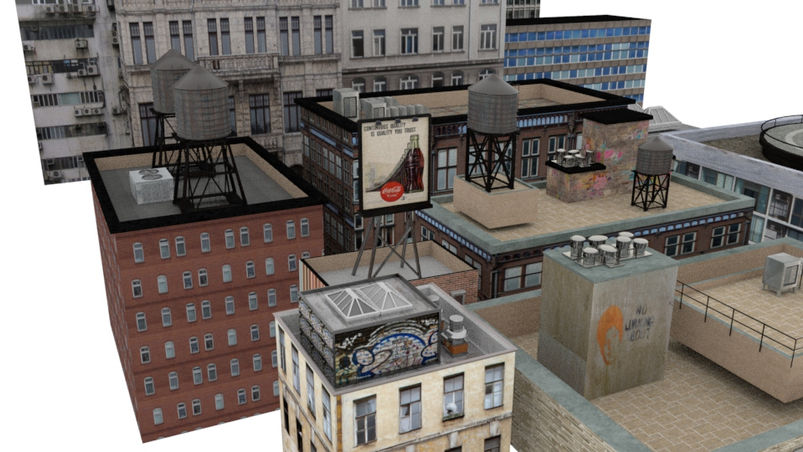
3D Models of rooftop objects


Screenshots of work process


Final Renders of NYC Rooftops with background sky and lighting


To be honest, I'm quite happy with my results. However, there is plenty of space to improve. The whole process of texturing seems complex to me, there is so much to learn.
Time Leap Project
For my project at first I was thinking about creating Notre Dame in Paris and the whole roundabout recreation but afterwards I decided that I will try to recreate a famous Cathedral from my hometown. It's located in Vilnius, Lithuania.
Mood board and reference images

The first steps of modelling


I started by creating the front columns which later I duplicated, then the base of the building with roofing and windows (I changed the windows later one). A long process of adding pieces little by little

Modelling and adding texture


Here I have a progress of my project in more detail.
Created more columns, windows in front and sides, fence as well as columns and more details on the second part of the cathedral.
For texturing used AiStandardsurface


Creating more details, textures and UV mapping


I have changed the windows made them more similar to the original. Added extra details by looking in depth to reference images.
I was thinking how to make the sculptures and where to get them. So, I went to google maps and print screened every single sculpture which was in the windows and added them to my project.
Used UV mapping.
The roof is an image of texture and used UV mapping as well.
Started adding lights.
FINAL touches


Added a background of 8k image and added lights mostly mesh light around cathedral from far and right next to it.
Here I have my first render images, they were very dark and found out that you have to check and have raw image saving option selected to have good quality renders. Mine was color managed before and therefore they looked like this.

Final render images


These are the final render images of the Vilnius Cathedral.
I had quite a long evening rendering since many of them I had to redo a few times until it looked as desired.
Overall, I'm happy with the results. Before I had doubts and thoughts about how it will look in the end or while having some struggles.
In the middle of the project Arnold shelf disappeared, had to install it into Maya again, then suddenly a few days after my project's textures were gone and the project was all green. Tried several things but only uninstalling and installing the whole Maya again worked.
Another problem was that my undo button randomly would stop working so I had to constantly go to preferences and turn it on.
However, I had the biggest fun modeling this cathedral and adding lightning, only the textures was a struggle.


